

NestJS module는 어떻게 등록되나요? (1)
1. 목표
NestJS 모듈이 초기화되는 내부 구현체를 살펴보고 작동 방식을 이해하며 전체 구조를 파악하는 것이 목표입니다.

2. 모듈
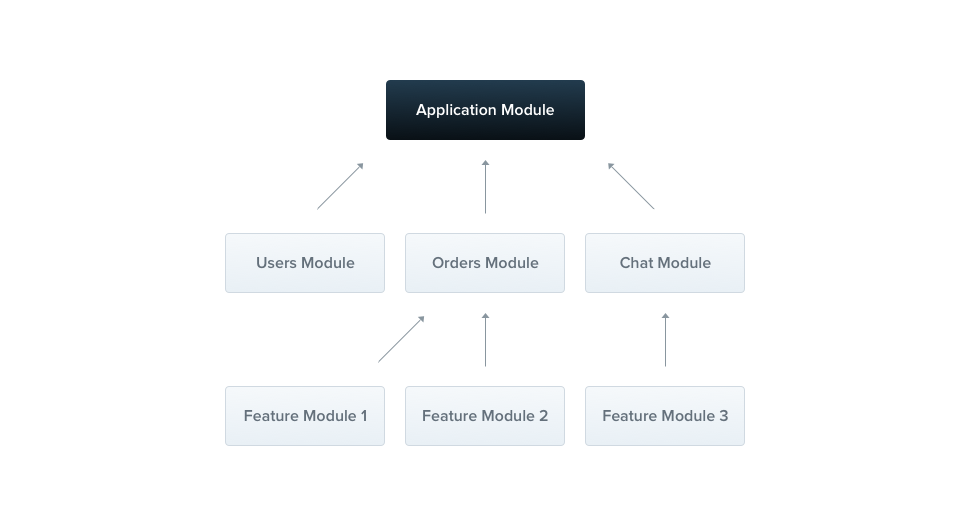
NestJS에서 모듈은 핵심 요소로, 여러 컴포넌트(프로바이더, 컨트롤러, 서비스, 기타 모듈 등)를 하나로 묶어 애플리케이션 구조를 조직화하고, 재사용 가능하며 명확한 책임 영역을 갖도록 해주는 핵심 개념입니다.
NestContainer을 초기화할 때 가장 상위 부모 모듈을 전달하여 초기화를 진행합니다. 이렇게 가장 중요한 핵심 요소인 모듈에 대해서 해당 글을 통해 깊게 알아 가보자 합니다.
3. 가장 상위 부모 모듈은 언제 전달되는가?
가장 상위 부모 모듈인 AppModule이 언제 전달되는지 확인하려면 가장 첫번째로 nest-factory부터 살펴보아야 합니다.
import { NestFactory } from '@nestjs/core';
import { AppModule } from './app.module';
async function bootstrap() {
const app = await NestFactory.create(AppModule);
await app.listen(3000);
}
bootstrap();
nest 프로젝트의 main.ts에서 애플리케이션을 초기화하고 구동할 때 사용하는 bootstrap 메서드입니다. 해당 부분에서 NestFactory.create 메서드를 먼저 살펴보겠습니다.
nest-factory
// nest-factory.ts
public async create<T extends INestApplication = INestApplication>(
moduleCls: any,
serverOrOptions?: AbstractHttpAdapter | NestApplicationOptions,
options?: NestApplicationOptions,
): Promise<T> {
...
await this.initialize(
moduleCls,
container,
graphInspector,
applicationConfig,
appOptions,
httpServer,
);
// DI 컨테이너, http 서버, 애플리케이션 설정, 그래프검사기, 옵션을 사용해서
// NestApplication 인스턴스를 생성합니다.
const instance = new NestApplication(
container,
httpServer,
applicationConfig,
graphInspector,
appOptions,
);
// 실제 애플리케이션 인스턴스를 중간 레이어인 프록시나 인터셉터로 감쌉니다.
const target = this.createNestInstance(instance);
// 실제 애플리케이션 인스턴스에 위임하는 프록시를 생성해 반환합니다.
// 적절한 http 서버 어댑터가 사용되도록 보장합니다.
return this.createAdapterProxy<T>(target, httpServer);
}
create 메서드를 통해 DI 컨테이너, http 서버, 애플리케이션 설정, 그래프 의존성 검사기, 옵션을 활용해서 NestApplication을 만듭니다.
이번에는 NestApplication의 초기화 과정에서 module의 초기화 과정에 집중해서 살펴보겠습니다.
우선 initialize 메서드를 통해서 가장 부모 모듈 (AppModule)을 인자로 전달하는데요, 이어서 initialize 메서드를 살펴보겠습니다.
initialize()
// nest-factory.ts
private async initialize(
module: any,
container: NestContainer,
graphInspector: GraphInspector,
config = new ApplicationConfig(),
options: NestApplicationContextOptions = {},
httpServer: HttpServer = null,
) {
...
try {
this.logger.log(MESSAGES.APPLICATION_START);
await ExceptionsZone.asyncRun(
async () => {
// 모듈을 scan 한다.
await dependenciesScanner.scan(module);
...
},
teardown,
this.autoFlushLogs,
);
} catch (e) {
this.handleInitializationError(e);
}
}
initialize 메서드를 볼까요?
이중에서 모듈을 전달하고 모든 의존성을 스캔하는 dependenciesScanner.scan 메서드에 대해서 살펴보겠습니다.
dependenciesScanner 클래스, scan 메서드
// scanner.ts
export class DependenciesScanner {
private readonly applicationProvidersApplyMap: ApplicationProviderWrapper[] =
[];
constructor(
private readonly container: NestContainer,
private readonly metadataScanner: MetadataScanner,
private readonly graphInspector: GraphInspector,
private readonly applicationConfig = new ApplicationConfig(),
) {}
public async scan(
module: Type<any>,
options?: { overrides?: ModuleOverride[] },
) {
await this.registerCoreModule(options?.overrides);
await this.scanForModules({
moduleDefinition: module,
overrides: options?.overrides,
});
await this.scanModulesForDependencies();
this.calculateModulesDistance();
this.addScopedEnhancersMetadata();
this.container.bindGlobalScope();
}
총 6개의 메서드가 scan 메서드에서 호출되는데요, 현재 코드로서는 역할을 정확히 알 수 없으니 하나씩 살펴보겠습니다.
registerCoreModule()
// scanner.ts
public async registerCoreModule(overrides?: ModuleOverride[]) {
const moduleDefinition = InternalCoreModuleFactory.create(
this.container,
this,
this.container.getModuleCompiler(),
this.container.getHttpAdapterHostRef(),
this.graphInspector,
overrides,
);
const [instance] = await this.scanForModules({
moduleDefinition,
overrides,
});
this.container.registerCoreModuleRef(instance);
}
registerCoreModule 메서드입니다.
해당 메서드를 통해서 core 모듈을 생성 후 스캔하고 등록하는 과정을 거칩니다.
InternalCoreModuleFactory 클래스, create 메서드
// internal-core-module-factory.ts
export class InternalCoreModuleFactory {
static create(
container: NestContainer,
scanner: DependenciesScanner,
moduleCompiler: ModuleCompiler,
httpAdapterHost: HttpAdapterHost,
graphInspector: GraphInspector,
moduleOverrides?: ModuleOverride[],
) {
const lazyModuleLoaderFactory = () => {
const logger = new Logger(LazyModuleLoader.name, {
timestamp: false,
});
const injector = new Injector();
const instanceLoader = new InstanceLoader(
container,
injector,
graphInspector,
logger,
);
return new LazyModuleLoader(
scanner,
instanceLoader,
moduleCompiler,
container.getModules(),
moduleOverrides,
);
};
InitializeOnPreviewAllowlist.add(InternalCoreModule);
return InternalCoreModule.register([
{
provide: ExternalContextCreator,
useFactory: () => ExternalContextCreator.fromContainer(container),
},
{
provide: ModulesContainer,
useFactory: () => container.getModules(),
},
{
provide: HttpAdapterHost,
useFactory: () => httpAdapterHost,
},
{
provide: LazyModuleLoader,
useFactory: lazyModuleLoaderFactory,
},
{
provide: SerializedGraph,
useFactory: () => container.serializedGraph,
},
]);
}
}
InternalCoreModuleFactory의 create 메서드를 통해 Dynamic module인 InternalCoreModule을 초기화하는 것을 확인할 수 있습니다.
ExternalContextCreator / ModulesContainer / HttpAdapterHost / LazyModuleLoader / SerializedGraph를 팩토리 패턴을 통해 동적으로 주입하는 것을 확인할 수 있네요.
ExternalContextCreator는 외부 요청의 컨텍스트를 생성하며, 주로 요청 핸들러의 실행 컨텍스트를 설정하는 데 사용됩니다.
ModulesContainer는 애플리케이션 내의 모든 모듈을 관리하고, 모듈간의 의존성을 추적하는 데 사용됩니다.
HttpAdapterHost는 HTTP 서버 어댑터에 대한 참조를 제공하며, 이를 통해 다양한 HTTP 서버 구현체와의 호환성을 지원합니다.
LazyModuleLoader는 필요시에만 모듈을 로드함으로써 애플리케이션 초기 로딩 시간을 최적화하는 데 사용됩니다.
SerializedGraph는 애플리케이션의 모듈 및 프로바이더 간의 관계를 직렬화하여, 의존성 그래프를 시각화하거나 분석하는 데 사용됩니다.
InternalCoreModule
import { DynamicModule, Global, Module } from '@nestjs/common';
import {
ExistingProvider,
FactoryProvider,
ValueProvider,
} from '@nestjs/common/interfaces';
import { requestProvider } from '../../router/request/request-providers';
import { Reflector } from '../../services';
import { inquirerProvider } from '../inquirer/inquirer-providers';
const ReflectorAliasProvider = {
provide: Reflector.name,
useExisting: Reflector,
};
@Global()
@Module({
providers: [
Reflector,
ReflectorAliasProvider,
requestProvider,
inquirerProvider,
],
exports: [
Reflector,
ReflectorAliasProvider,
requestProvider,
inquirerProvider,
],
})
export class InternalCoreModule {
static register(
providers: Array<ValueProvider | FactoryProvider | ExistingProvider>,
): DynamicModule {
return {
module: InternalCoreModule,
providers: [...providers],
exports: [...providers.map(item => item.provide)],
};
}
}
InternalCoreModule 모듈은 nest 내부적으로 만드는 core 모듈인데요, 저희가 nest 앱을 구축해 나갈 때 module을 정의하는 것처럼 모듈이 정의되어 있습니다.
register 메서드를 통해 전달받은 providere들을 바탕으로 동적 모듈을 반환합니다. 해당 모듈을 통해 핵심 기능들인 ExternalContextCreator / ModulesContainer / HttpAdapterHost / LazyModuleLoader / SerializedGraph가 등록되었습니다.
register()를 호출한 InternalCoreModule은 어떻게 되는가?
{
module: InternalCoreModule,
providers: [...providers],
exports: [...providers.map(item => item.provide)],
};
- register 메서드를 통해서 InternalCoreModule는 DynamicModule이 됩니다.
{
// 기존 InternalCoreModule
module: {
providers: [
Reflector,
ReflectorAliasProvider,
requestProvider,
inquirerProvider,
],
exports: [
Reflector,
ReflectorAliasProvider,
requestProvider,
inquirerProvider,
],
},
// 동적으로 추가된 providers & exports
providers: [
{
provide: ExternalContextCreator,
useFactory: () => ExternalContextCreator.fromContainer(container),
},
{
provide: ModulesContainer,
useFactory: () => container.getModules(),
},
{
provide: HttpAdapterHost,
useFactory: () => httpAdapterHost,
},
{
provide: LazyModuleLoader,
useFactory: lazyModuleLoaderFactory,
},
{
provide: SerializedGraph,
useFactory: () => container.serializedGraph,
},
],
exports: [
ExternalContextCreator,
ModulesContainer,
HttpAdapterHost,
LazyModuleLoader,
SerializedGraph
],
};
즉 런타임에 동적인 설정을 추가하여 모듈이 탄생하는 것이지요! DynamicModule이라고 해서 어려울 것 없습니다. 그저 기존의 module에 추가적인 정보를 (동적으로) 추가했을 뿐 입니다.
다시 registerCoreModule, scanForModules 메서드
// scanner.ts
public async registerCoreModule(overrides?: ModuleOverride[]) {
const moduleDefinition = InternalCoreModuleFactory.create(
this.container,
this,
this.container.getModuleCompiler(),
this.container.getHttpAdapterHostRef(),
this.graphInspector,
overrides,
);
const [instance] = await this.scanForModules({
moduleDefinition,
overrides,
});
this.container.registerCoreModuleRef(instance);
}
이제 InternalCoreModule을 만들었으니 scanForModules 메서드를 통해 스캔하여 모듈의 의존성을 탐색하고 등록합니다. 위에서 보았듯, moduleDefinition는 DynamicModule입니다.
registerCoreModuleRef 메서드를 통해 nestContainer의 internalCoreModule, modules 배열에 새로 등록합니다
// container.ts
public registerCoreModuleRef(moduleRef: Module) {
this.internalCoreModule = moduleRef;
this.modules[InternalCoreModule.name] = moduleRef;
}
// scanner.ts
public async scanForModules({
moduleDefinition,
lazy,
scope = [],
ctxRegistry = [],
overrides = [],
}: ModulesScanParameters): Promise<Module[]> {
// 모듈을 삽입하거나 재정의하고 모듈 참조 및 삽입 여부를 반환합니다.
const { moduleRef: moduleInstance, inserted: moduleInserted } =
(await this.insertOrOverrideModule(moduleDefinition, overrides, scope)) ??
{};
// 모듈 재정의가 있는 경우 모듈 정의를 업데이트합니다.
moduleDefinition =
this.getOverrideModuleByModule(moduleDefinition, overrides)?.newModule ??
moduleDefinition;
// // 비동기적으로 모듈이 정의되었을 때 await를 적용합니다
moduleDefinition =
moduleDefinition instanceof Promise
? await moduleDefinition
: moduleDefinition;
// 컨텍스트 레지스트리에 현재 모듈 정의를 추가합니다.
ctxRegistry.push(moduleDefinition);
// 전달 참조(forward reference)인 경우 참조된 모듈을 가져옵니다.
if (this.isForwardReference(moduleDefinition)) {
moduleDefinition = (moduleDefinition as ForwardReference).forwardRef();
}
// 모듈이 동적 모듈인지 아닌지를 판별하고, 관련 메타데이터를 통해 의존성을 반영합니다.
// import에 있는 모듈들의 메타데이터를 모두 가져옵니다.
const modules = !this.isDynamicModule(
moduleDefinition as Type<any> | DynamicModule,
)
// 동적 모듈이 아니면, 모듈의 imports에 들어가 있는 배열을 가져옵니다.
? this.reflectMetadata(
MODULE_METADATA.IMPORTS,
moduleDefinition as Type<any>,
)
: [
...this.reflectMetadata(
MODULE_METADATA.IMPORTS,
(moduleDefinition as DynamicModule).module,
),
...((moduleDefinition as DynamicModule).imports || []),
];
// 이미 등록된 모듈 참조들을 관리하는 배열을 초기화합니다.
let registeredModuleRefs = [];
// 각 import 된 모듈을 순회하며, 순환 의존성이나 잘못된 모듈의 경우 예외를 발생시킵니다.
for (const [index, innerModule] of modules.entries()) {
// 순환 참조시 undefined
if (innerModule === undefined) {
throw new UndefinedModuleException(moduleDefinition, index, scope);
}
if (!innerModule) {
throw new InvalidModuleException(moduleDefinition, index, scope);
}
// 이미 컨텍스트 레지스트리에 있는 모듈을 건너뜁니다.
if (ctxRegistry.includes(innerModule)) {
continue;
}
// 내부 모듈을 스캔합니다.
// 해당 메소드를 보면 재귀라는 것을 알 수 있습니다.
// scope는 현재 모듈의 부모 모듈들이 루트(AppModule)부터 순서대로 들어있습니다.
const moduleRefs = await this.scanForModules({
moduleDefinition: innerModule,
scope: [].concat(scope, moduleDefinition),
ctxRegistry,
overrides,
lazy,
});
// 재귀를 다 돌고 자식 모듈의 자식 모듈까지 모두 스캔을 완료하였다면 등록합니다.
registeredModuleRefs = registeredModuleRefs.concat(moduleRefs);
}
// 모듈 인스턴스가 없으면 현재 등록된 모듈 참조들을 반환합니다.
if (!moduleInstance) {
return registeredModuleRefs;
}
// 지연 로딩 모드인 경우 글로벌 모듈들을 현재 모듈에 바인딩합니다.
if (lazy && moduleInserted) {
this.container.bindGlobalsToImports(moduleInstance);
}
// 현재 모듈 인스턴스와 등록된 모듈 참조들을 결합하여 반환합니다.
return [moduleInstance].concat(registeredModuleRefs);
}
scanForModules 메서드는 모듈 정의와 관련된 매개변수를 받아서 모듈을 스캔하는 메서드입니다. @Module 데코레이터의 imports 메타데이터를 읽어, 관련 모듈들을 처리합니다.
재귀를 통해서 단 한 번의 호출로 해당 모듈의 자식 모듈, 그 자식 모듈의 자식 모듈까지 모두 불러옵니다. 이때 reflectMetadata를 통해 모듈의 정보(import)를 가져오는 방법들 등에 집중해서 살펴보겠습니다.
4. 이어가며
글이 너무 길어지는 관계로 다음 글에 이어서 작성하려고 합니다. 기존에 작성한 글과 (NestJS 컨테이너, DI는 어떻게 작동할까) 맥락은 비슷할 수 있는데요, 해당 글에서는 전체적인 그림을 톺아보았더라면 이번에는 모듈에만 집중해서 더 깊게 알아보며 이해한 글을 기록하고자 합니다.